IKEA ALEX Custom Desk Hack
This Post May Contain Affiliate Links. Please Read Our Disclosure Policy for more details.
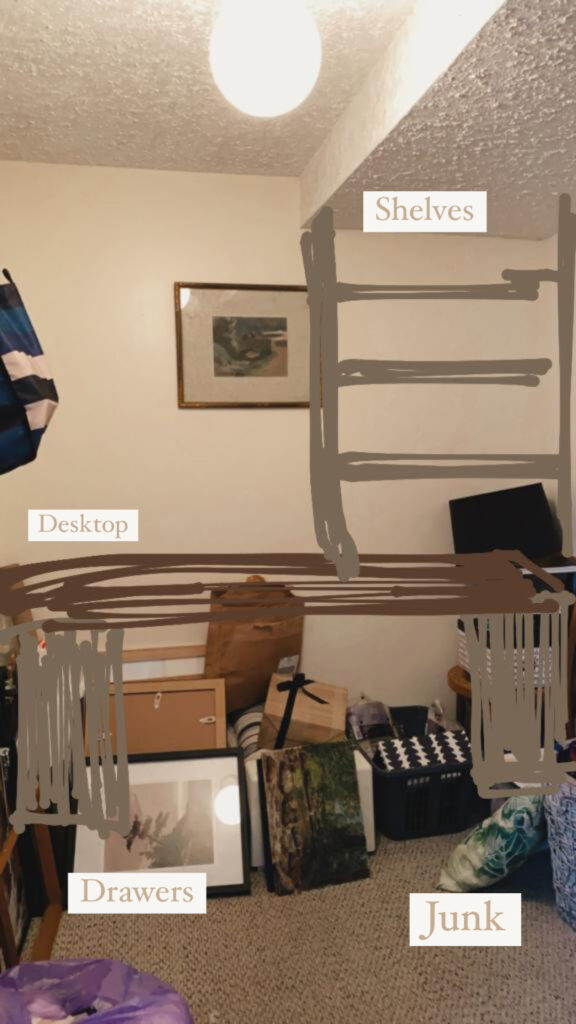
After being on a year long maternity leave during 2020, I returned to my full-time job in public health in a work from home capacity. At the time, I didn’t have a home office, but I did have a small room in our basement that I called the “Monica Closet” because it collected all of our junk. With my return to work date looming, I decided to convert this space into an office using IKEA Alex drawers. I love that the IKEA Alex drawers are super functional with a file hanging drawer. However, they aren’t the cutest. So here is how I upgraded them with an IKEA ALEX Custom Desk Hack.
Before & After
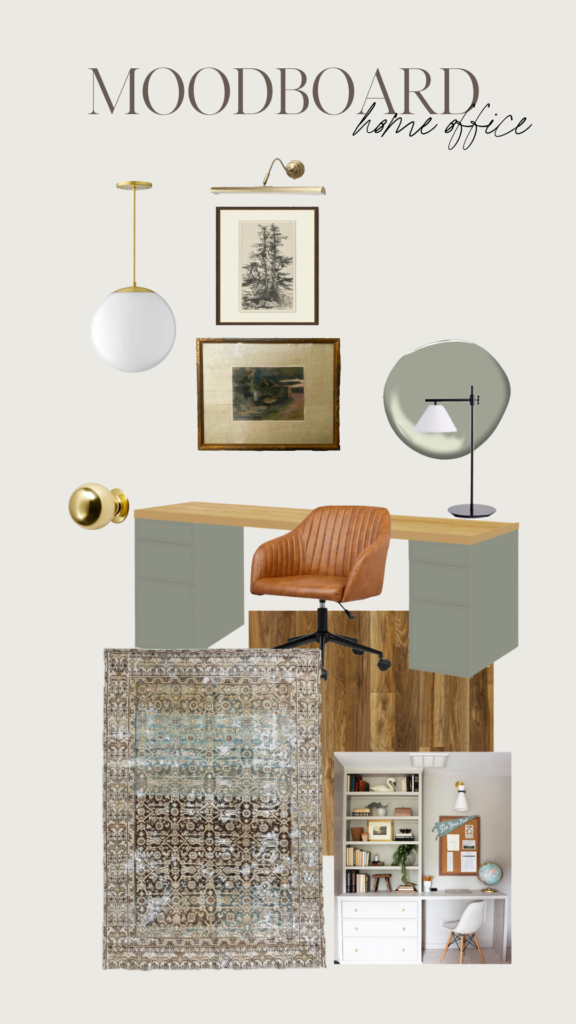
The Moodboard
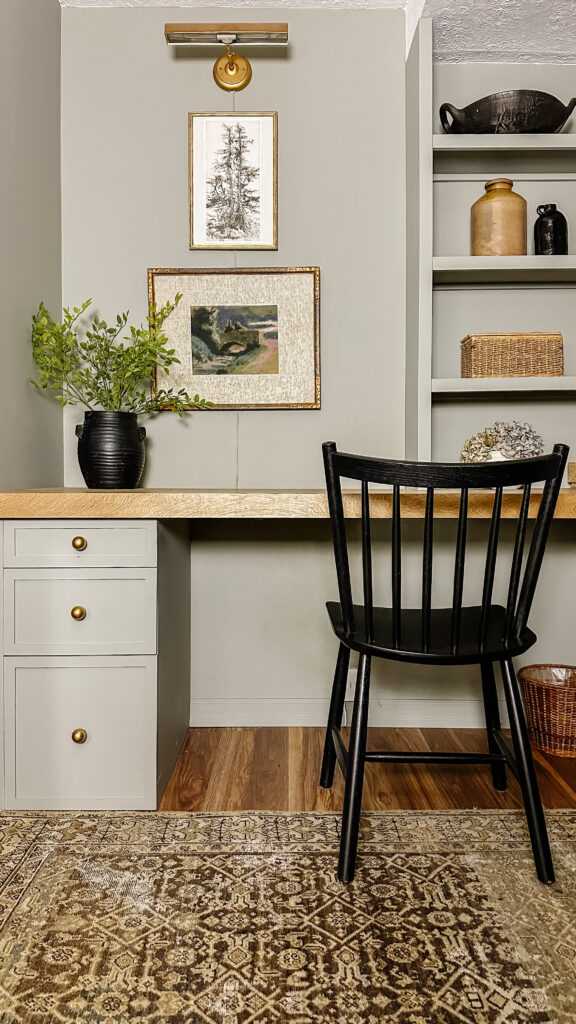
As with every project, I like to start with a moodboard. The jumping point was this STUNNING antique rug from Passerine Home. I won a $1000 shop credit on Instagram and even with the credit it still cost me a few hundred dollars. Yikes! But lucky for you I’ve found a super similar rug for a fraction of the price here. I also knew I wanted to use this antique oil pastel art that used to hang in my Oma and Opa’s house. If you are interested in downloading a printable version of it, you can check out my vintage art collection!
Supplies
- IKEA ALEX drawers
- 1/8″ hardboard
- cabinet hardware
- construction adhesive
- clamps
- 1/2″ plywood
- Primer
- Paint of choice (preferably cabinet paint)
- paintable caulk
Tools
- Table Saw or Circular Saw*
- Nail Gun (for adding trim)
- Screw gun (for attaching desk to walls and desktop)
*If you don’t have table or circular saw, ask your local hardware store to cut your wood for the table top to size. They may also be able to cut the drawer fronts however they may not be as accurate.
Customizing the IKEA ALEX Drawers
After pulling out the carpet and installing some laminate floors that my dad had leftover from a past project, I got started building my IKEA ALEX Drawers. There are a few versions but I chose this version with the hanging file storage. I didn’t love that the file drawer looked so large and unbalanced with the three smaller drawers. But I had a plan to fix that!
First, I took my measurements. I wanted the drawer fronts to over-lay the cabinet frame so I measured the width (4) frame-to-frame which was 14.25″. And then I measured distances 1, 2, and 3 as seen in the image below. I designed drawer front #2 to hide the second and third drawer and make the unit look like it had 3 drawers.
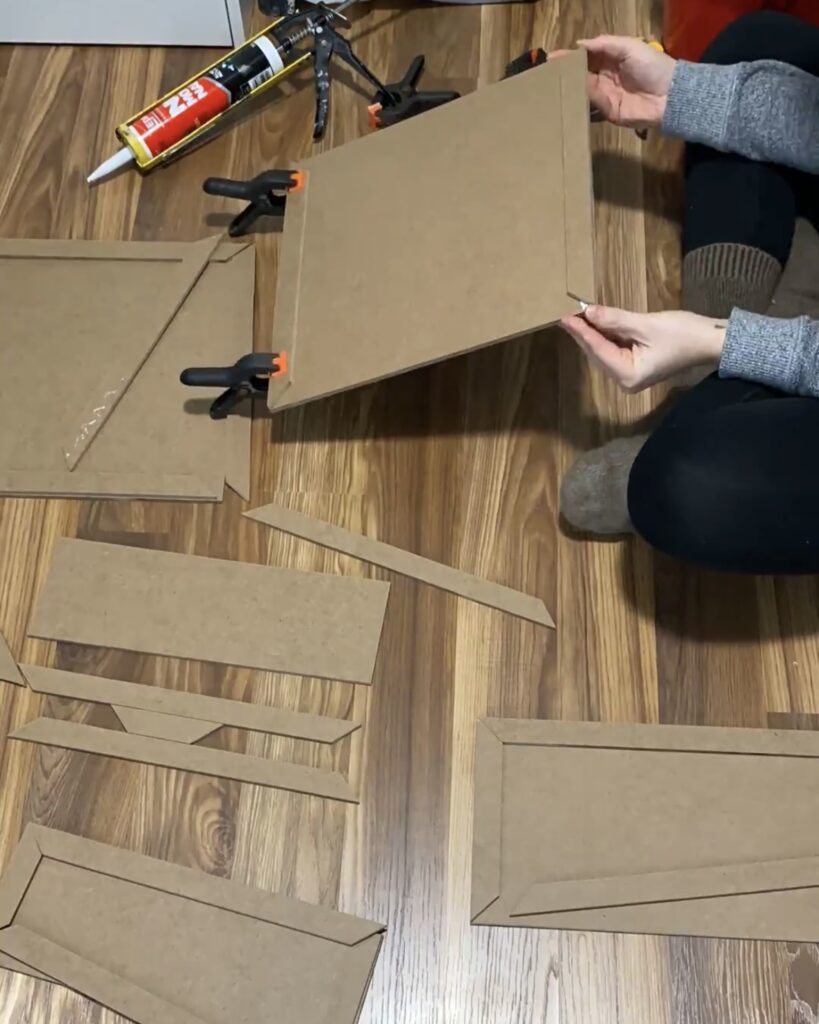
Once I had my measurements, I cut all three drawer fronts out of a piece of 1/8″ hardboard using my table saw.
- Drawer front #1: 4 5/8″h x 14 1/4″w
- Drawer front #2: 8 1/4″h x 14 1/4″w
- Drawer front #3: 14 7/16″h x 14 1/4″w
I then ripped down 1″ pieces of the same 1/8″ hardboard to create a slim shaker profile. Using the measurements above, I cut the trim with 45 degree mitred corners for each drawer front.
TIP: If you want your drawer fronts to have a more traditional feel, cut your trim pieces 2-3″ wide. This will create a more classic shaker style.
Attaching the Drawer Fronts
Once the trim was attached to the drawer fronts, I used construction adhesive and clamps to align the fronts on the IKEA ALEX drawers.
For the second drawer front, I only applied the construction adhesive to the third drawer. This allowed the second drawer to be hidden but still functional.

Building in the Drawers
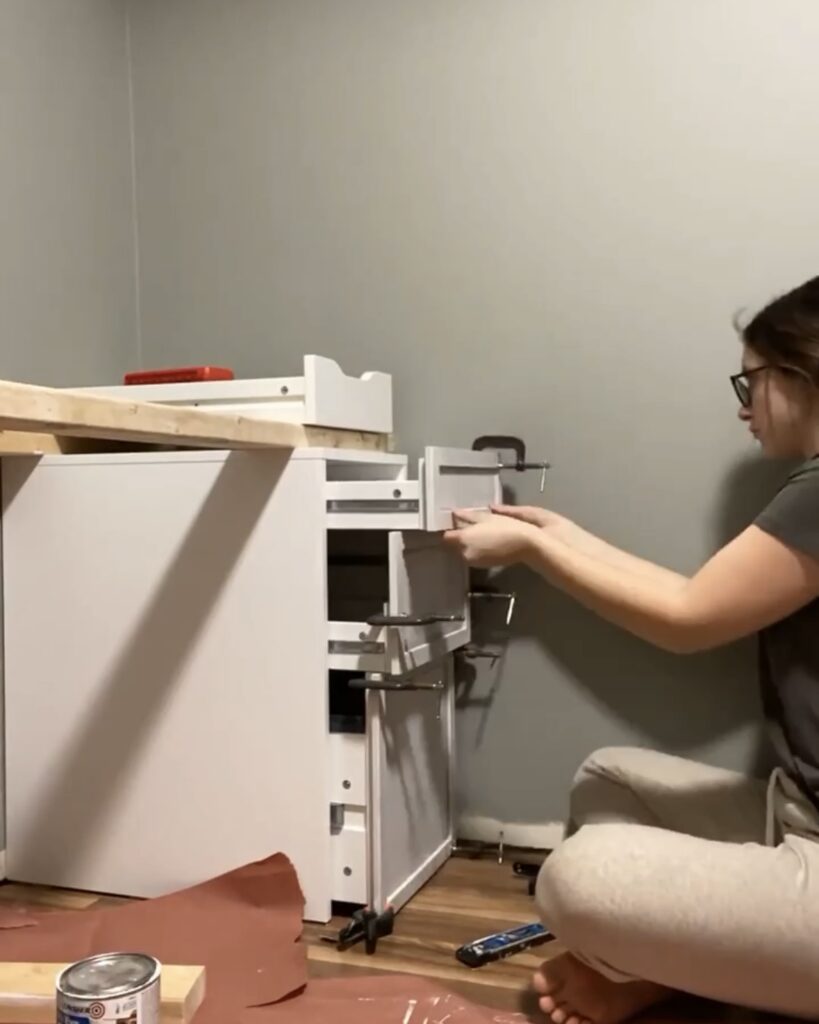
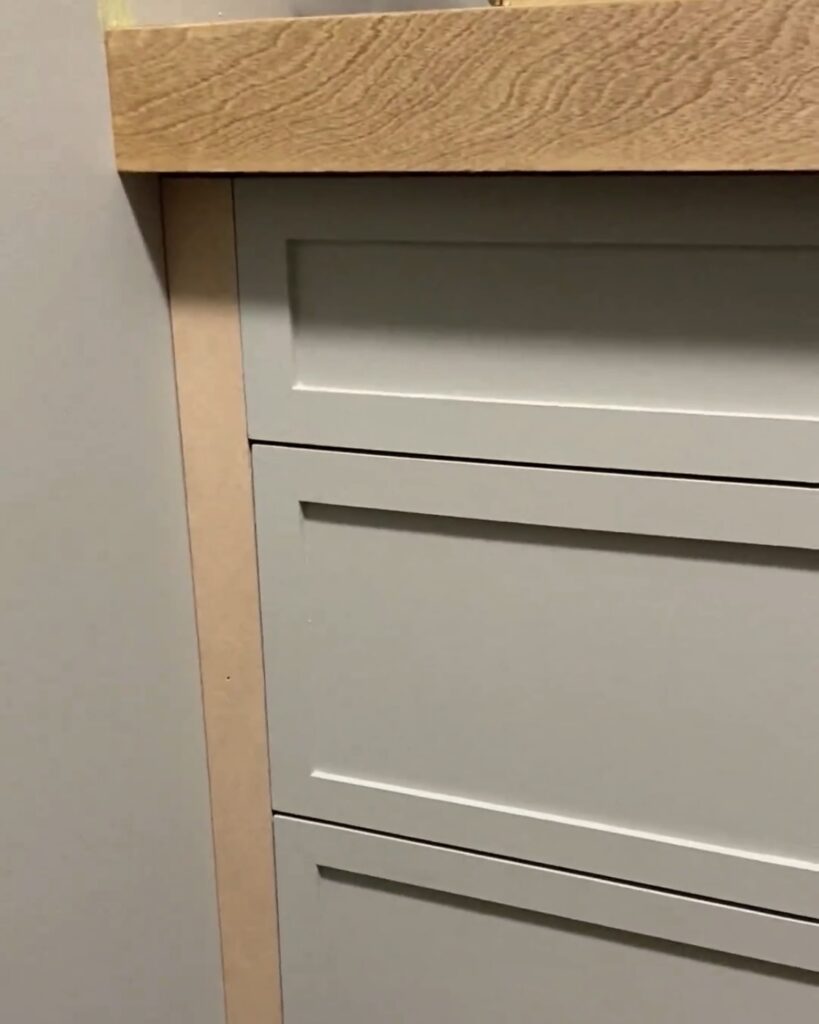
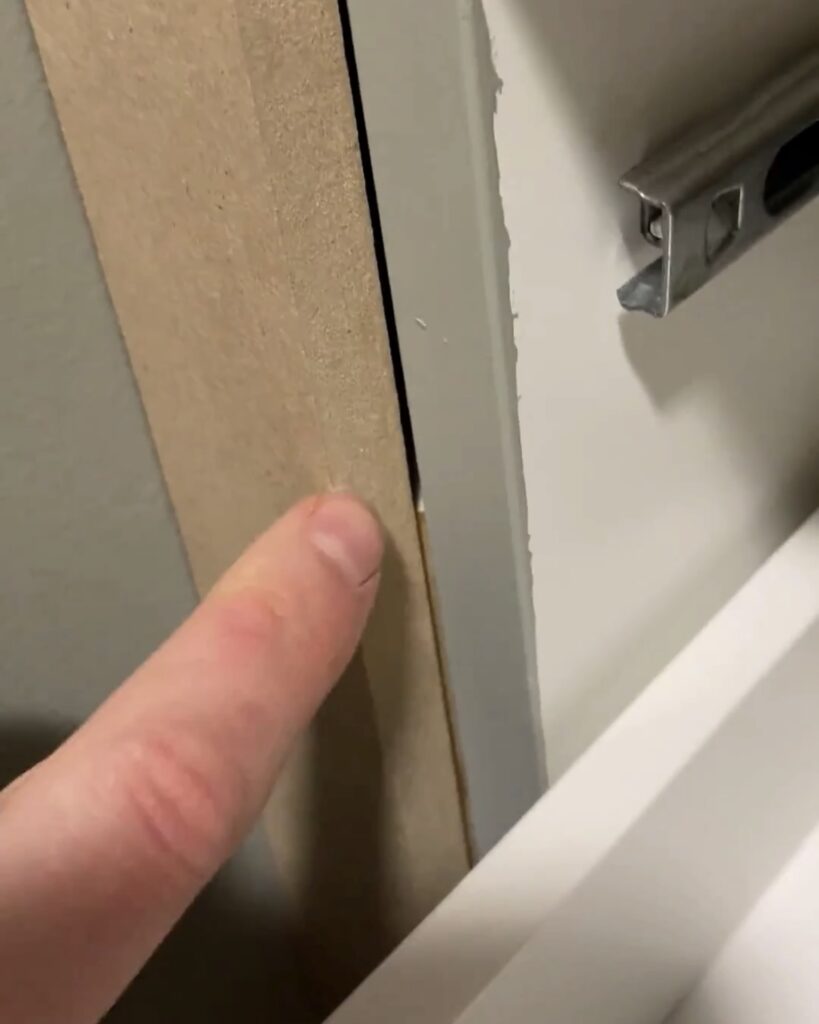
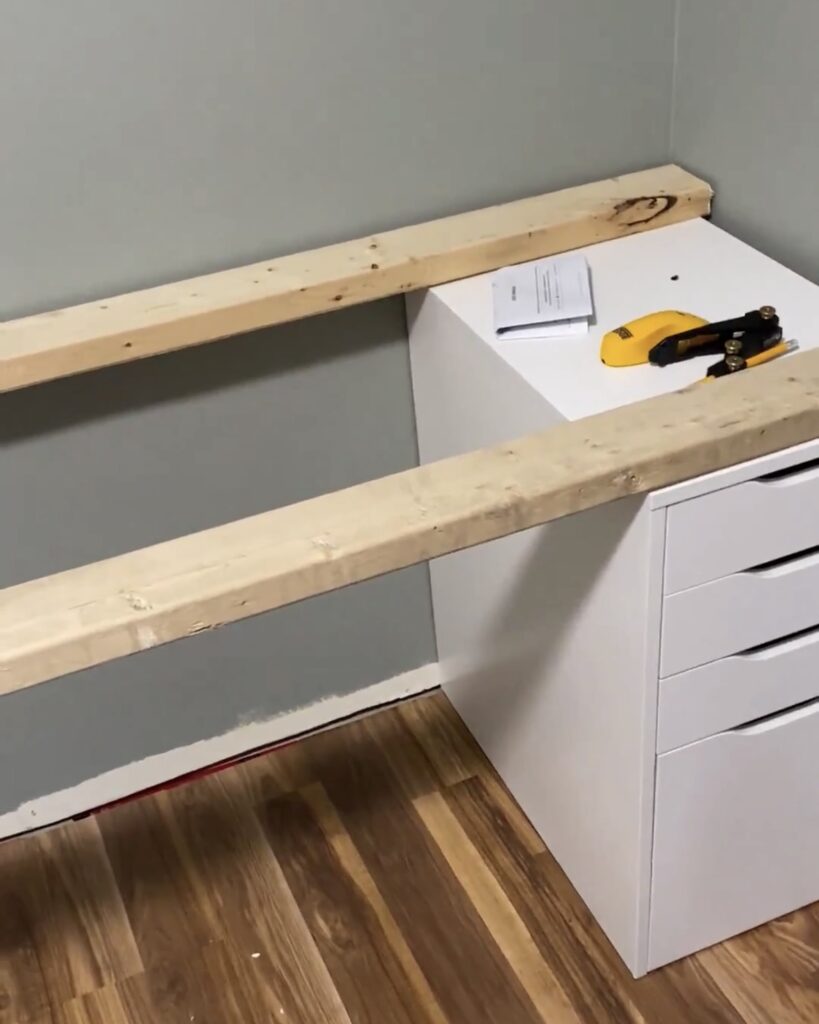
To make this IKEA hack look really custom, I knew I wanted the drawers to be “built in.” I secured the IKEA ALEX drawers to each wall with a 2″x4″ sandwiched between the unit and the wall. I made sure the 2″x4″ was flush with the frame of the ALEX unit. This gave me something to nail my trim into. I used MDF to cut a filler piece and a nail gun to attach it to the 2″x4″. In the photo below you can see the the 2″x4″ that I nailed the filler piece into. This gap was then caulked. This was so simple but really made the desk look custom.
Painting the IKEA ALEX Drawers
The next step to making this desk look really custom was paint. I wanted the office and the desk to be the same colour – I chose Benjamin Moore Oil Cloth.
The most important step when painting IKEA Furniture is to use the right primer. This is the ONLY primer you should use on IKEA furniture. TRUST ME.
Once I primed and painted the unit, drawer fronts and trim, I got to work on the desk top.
Building a Desk Top
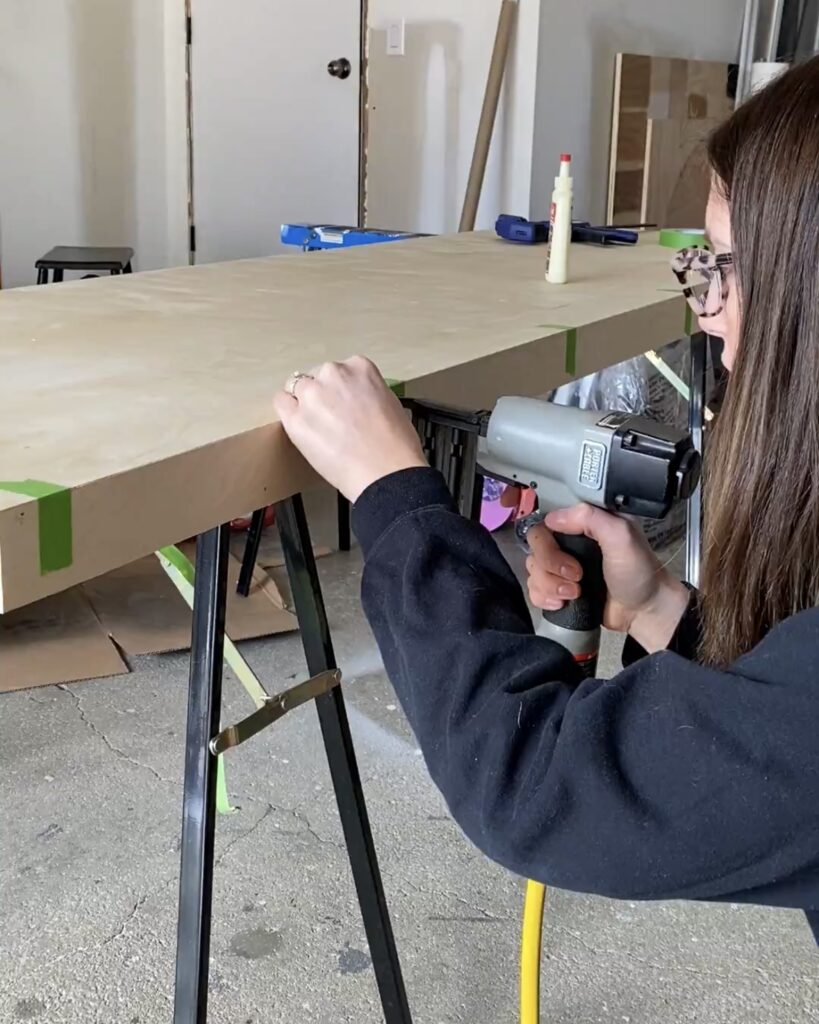
In an effort to keep this budget friendly, I bought a 1/2″ sheet of one sided Birch plywood. I cut it down to size with a 45 degree angle on the front edge. I then added a 2″ piece of the same plywood (cut on the 45 degree as well) to seamlessly beef up the front edge. This isn’t 100% necessary but I liked that it made the desktop look thicker.
TIP: If you don’t have a table saw or circular saw that will cut on a 45 degree angle, ask your hardware store to cut your desk top to size. Use a 2″ wide piece of pine and nail that to the front edge.
I stained the desktop with Mixwax Golden Oak and sealed it with Minwax Polyurethane in Matte.
To attached the desktop, I added two 2″x4″s across the two IKEA ALEX cabinets. I then placed the desktop on top. I screwed the desktop to the 2″x4″s from the under side of the desk. My desktop fit snug enough that I didn’t need to attach it to the cabinets, however you could screw it on from inside the cabinets.
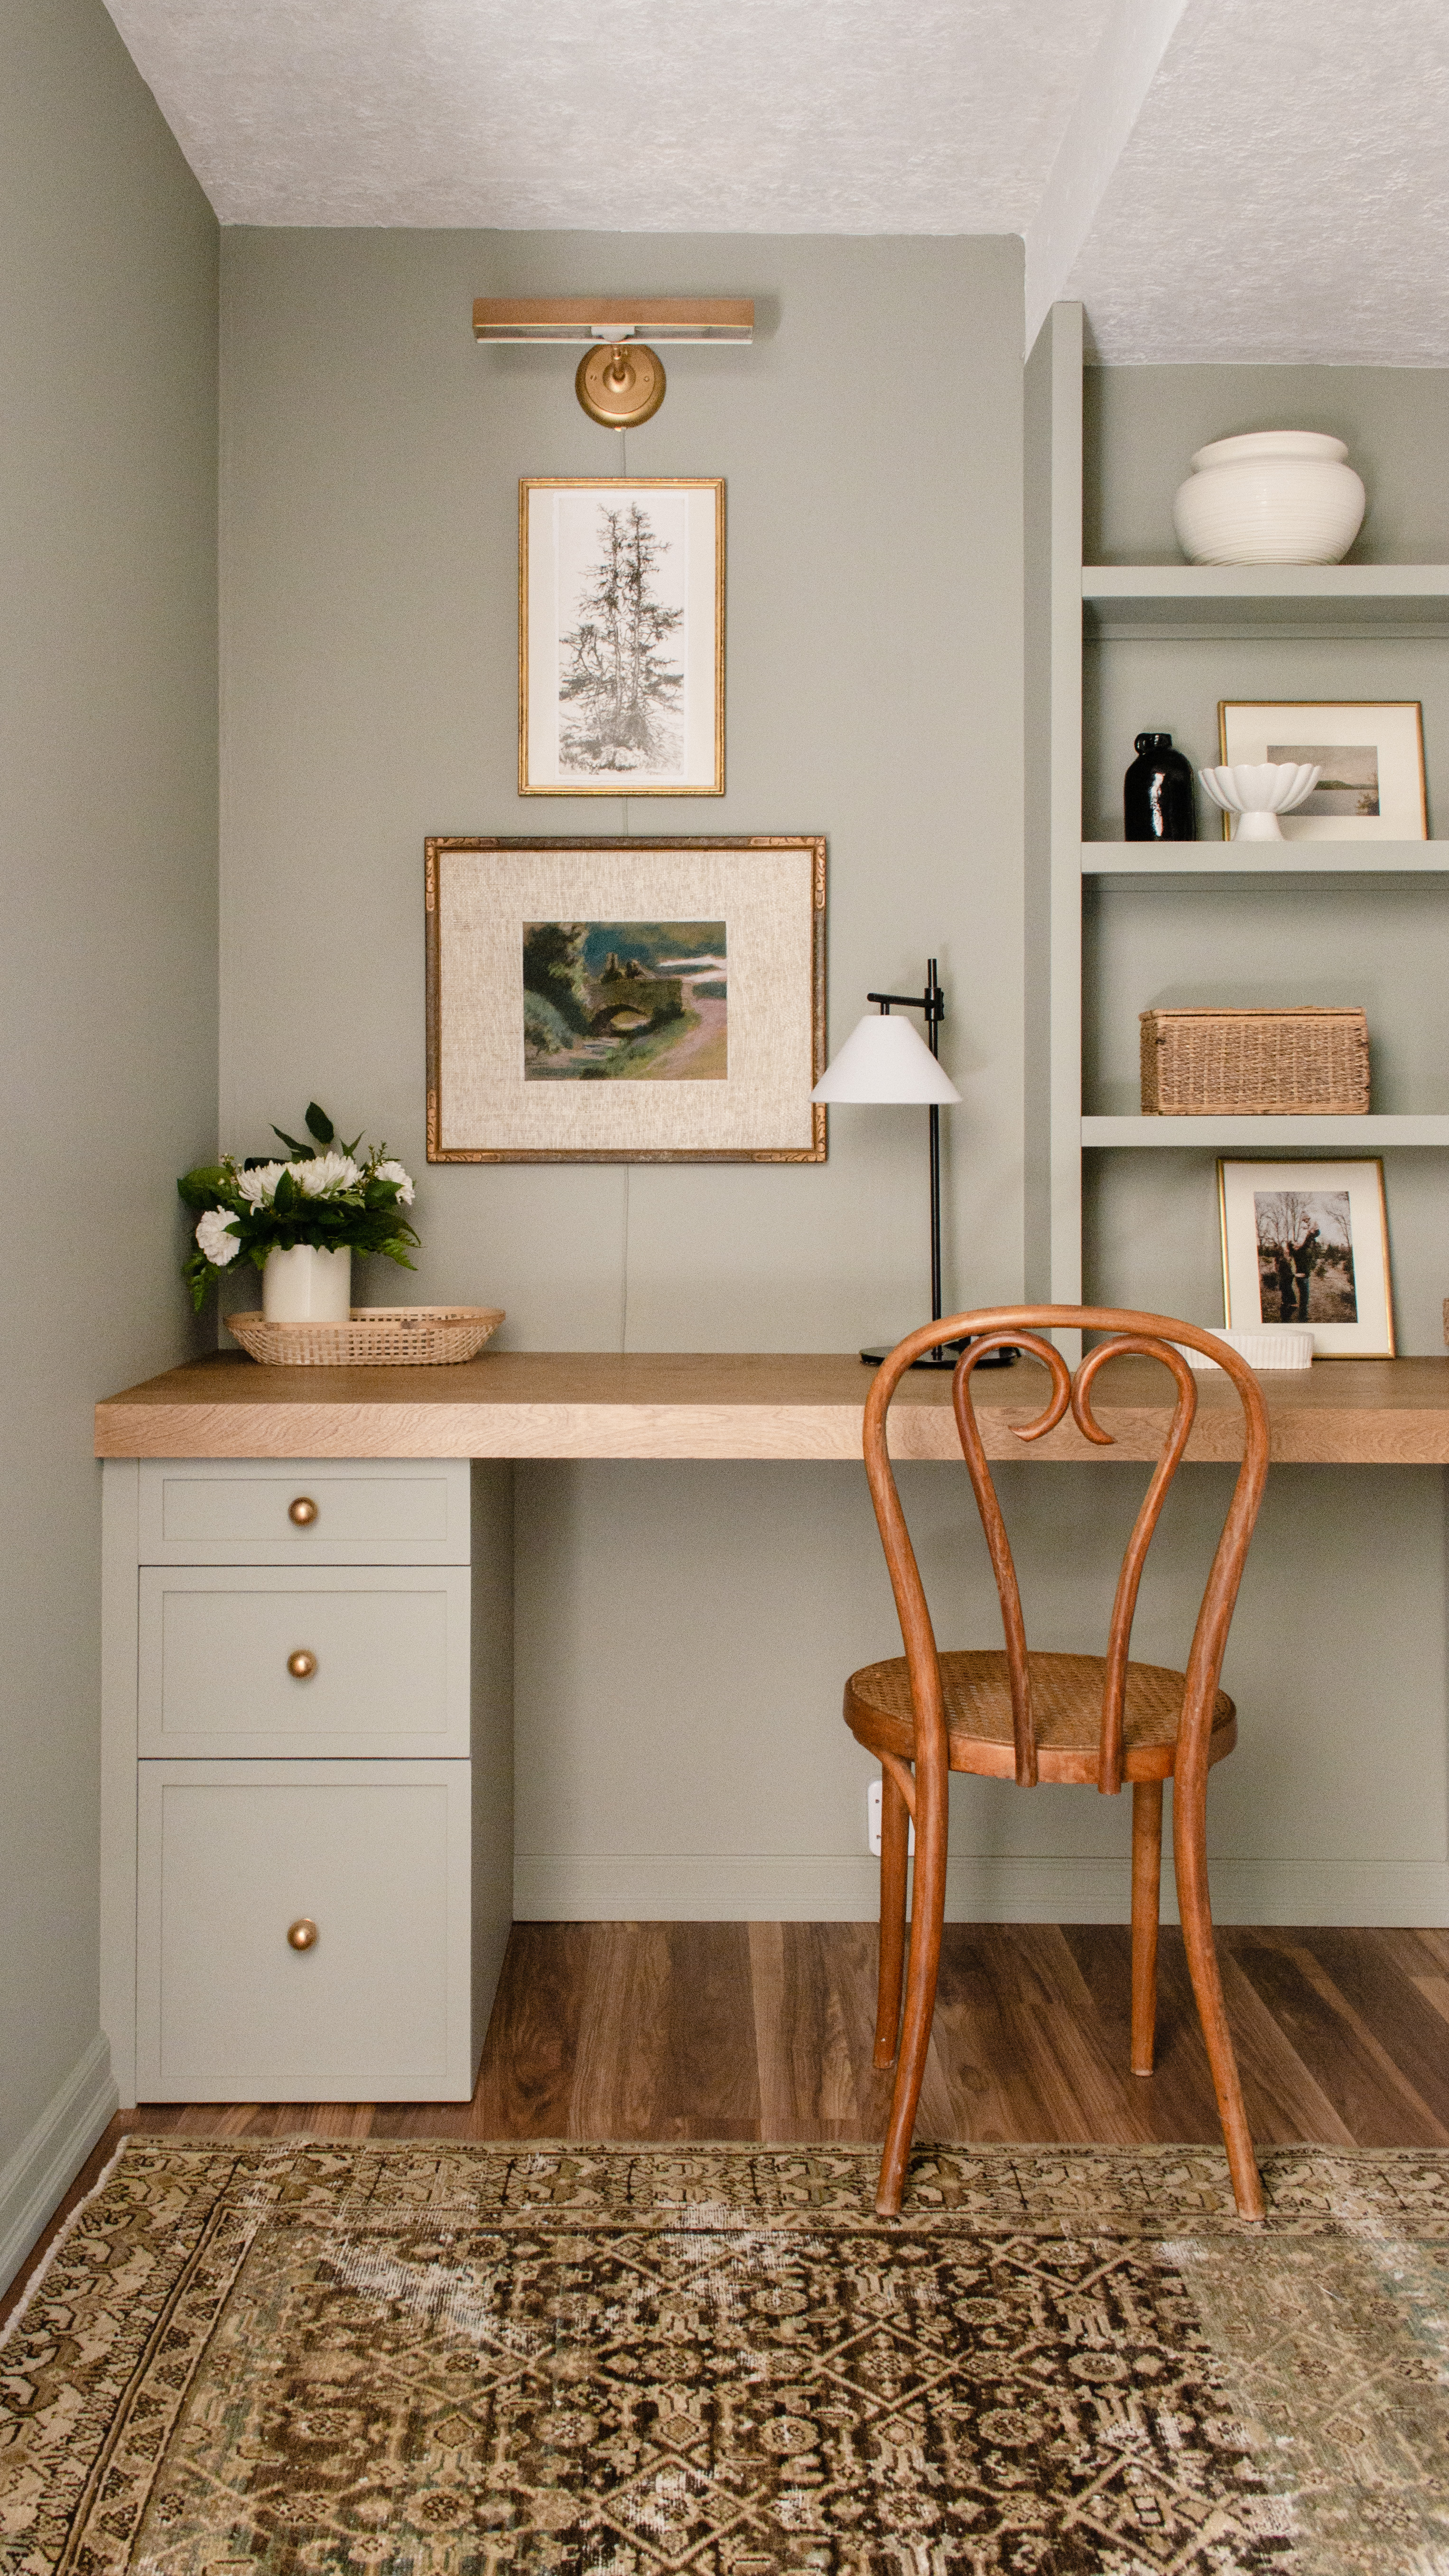
Building Shelves
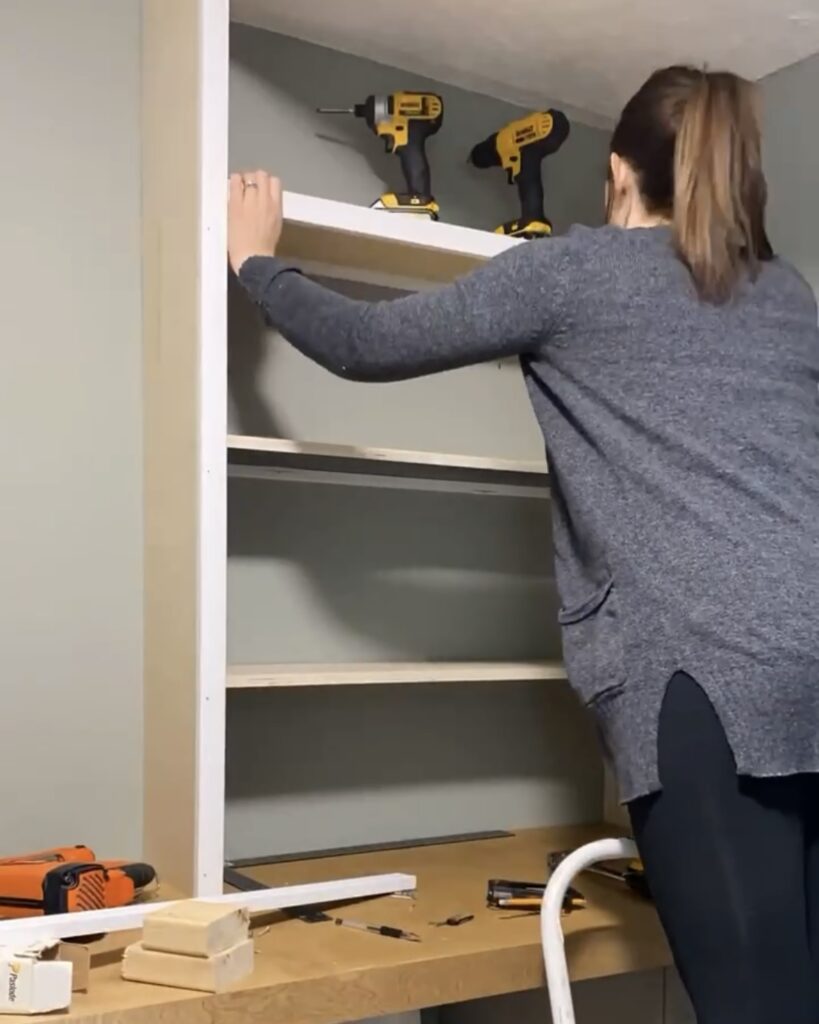
This office space had a large bulkhead for duct work running along one side of the ceiling. In an attempt to make this look more intentional, I decided to add built in shelves.
I used the leftover 1/2″ plywood from the desk top to create built in shelves. I cut two side pieces, measuring from my desktop to the ceiling. I added three shelves and then used trim to bulk up the faces of the side panels and shelf fronts. I filled all the nail holes and caulked all the seams before painting the shelves to match the walls.
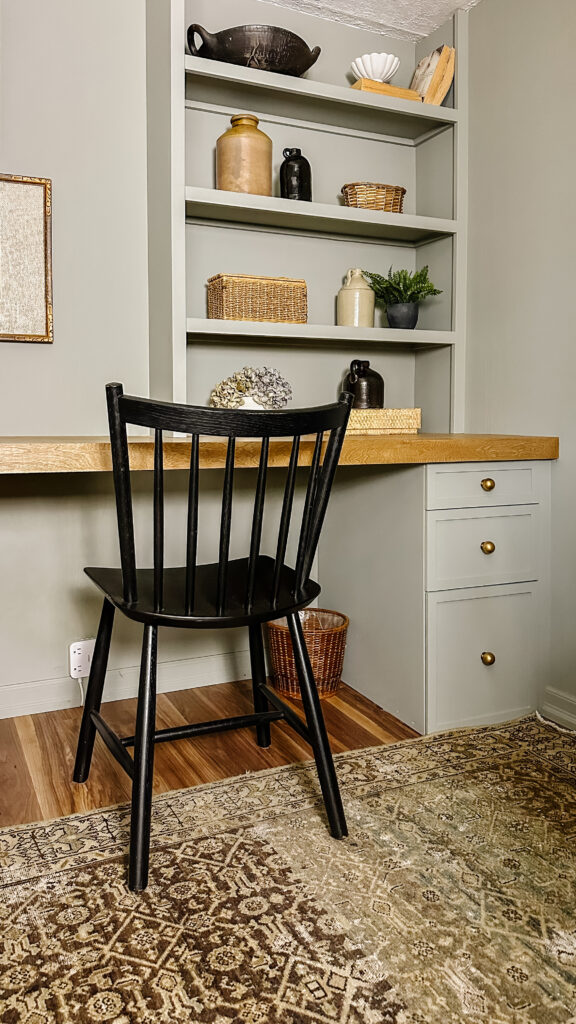
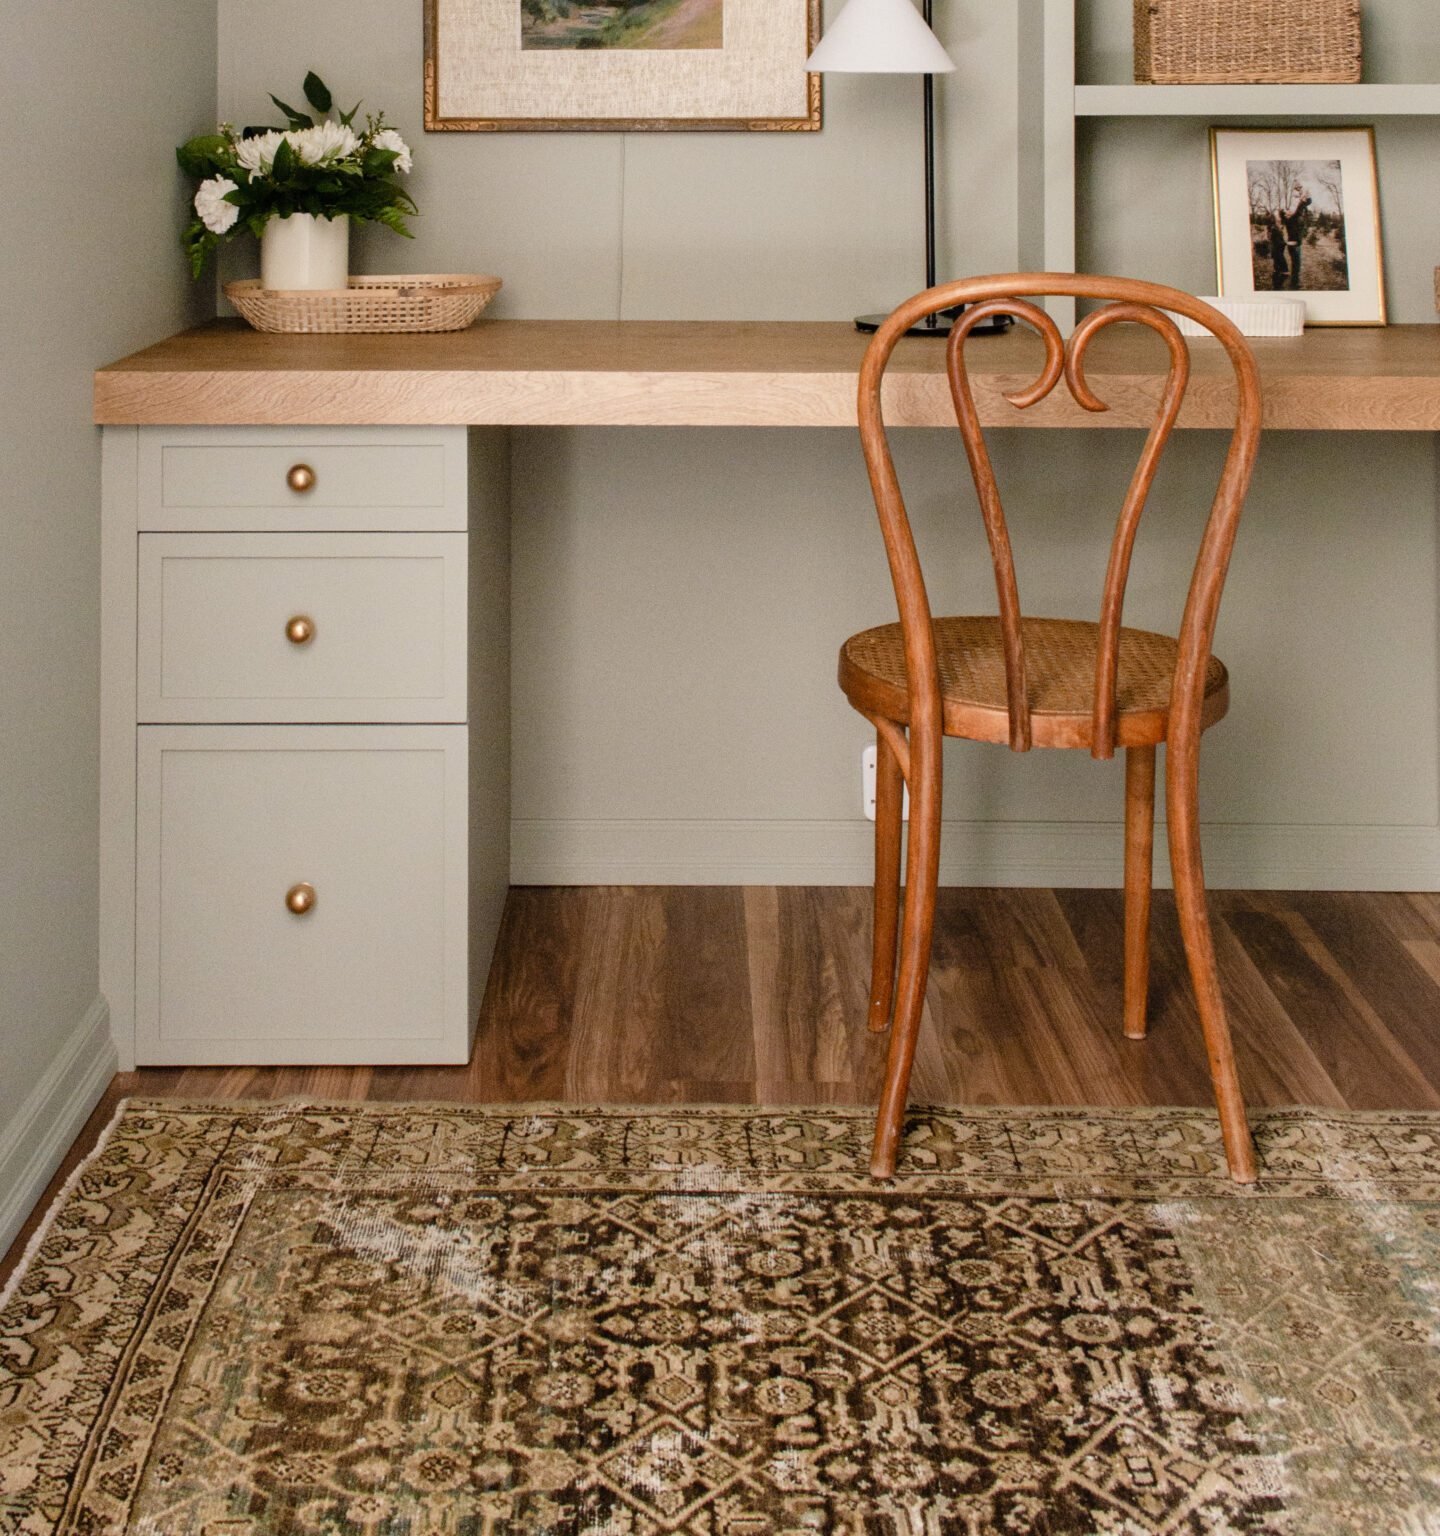
IKEA ALEX Custom Desk Hack Reveal
After a couple years of full-time use, I can say that this office has been a work horse. I’ve been meaning to take new photos of it for a while but while I’m working (I’m currently on maternity leave), the desktop is covered in multiple monitors and the chair is replaced with an ugly ergonomic desk chair. After 8 months off work and a quick restyle – here is a look at it today. Would you have guessed it is IKEA?